Email notifications are dynamically constructed and sent at runtime using the specified Email Template in the Activity Properties toolbar. An activity can have more than one email related property. For example, an activity can have multiple email notifications related to the different stages of the activity. This allows different types of email notifications to be sent out during the different stages of an activity. The different types of email notifications include: Incoming Email, Outgoing Email, Reassigning Email, TimeOut Email (e.g. the Manual with Timeout Activity only), and Reminding Email.
- Incoming Email
Incoming email that is dynamically constructed and sent automatically to the participant(s) defined in the email template notifying them when the activity is entered.
- Outgoing Email
Outgoing email that is dynamically constructed and sent automatically to the recipient(s) defined in the email template notifying them when the activity is exited.
- Reassigning Email
Email that is dynamically constructed and sent automatically to the participant(s) defined in the email template notifying them that the activity has been reassigned.
- TimeOut Email
(Available only for the Manual with Timeout activity) Email that is dynamically constructed and sent automatically to the participant(s) defined in the email template notifying them when the activity pasts its due date.
- Reminding Email
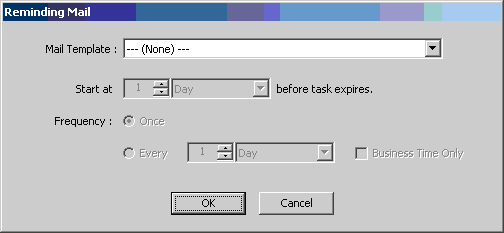
Email that is dynamically constructed and sent automatically to the recipient(s) defined in the email template reminding them of an activity to complete. The Reminding Email Notification can be configured to be sent at recurring intervals.
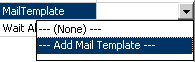
To create a new Incoming Email Notification:
To create a Reminding Email Notification:
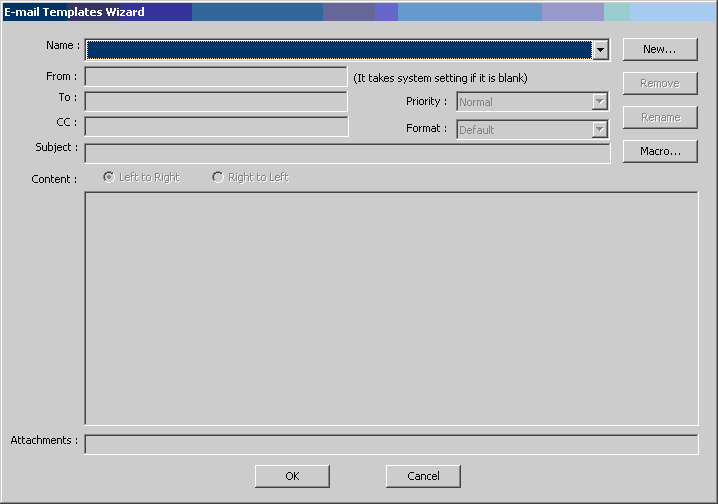
Email Template Fields:
This section provides information and instructions about how to use the fields in the Email Template. The fields in the Email Template are used to specify what the participant(s) will see when the Email Notification is opened. In addition to manually typing in the value of a field, most of the fields in the Email Template allow you to also select from a list of process attributes to dynamically populate that field at runtime. To bring up the list of available process attributes, type ${ in the text box and select the process attribute for which you would like to use in that field. For example, you may want to select ${TaskParticipantUserName} in the “To” field of your Email Template. The “To” field will be populated with the user name of the task’s participant. For a list of available process attributes and their definitions, see Process Attributes.
Incoming and Reminding emails are sent separately for each participant, while Outgoing emails are sent per activity (regardless of number of participants). Therefore, if your email address is in the “To” or “CC” field of the email template associated with the Incoming email, you will get X number of copies of the email. If the entire list of (potential) participants is in the “To” or “CC” field, then all of the (potential) participants will receive X number of copies of the email. If you use the "${TaskParticipantUserName}" process attribute in the “To” field instead of specifying the entire list of participants in the “To” field, then for each participant, a separate email will be sent, and none of the participants will receive duplicate copies of the email. If you want to send a single email to all of the (potential) participants (instead of separate messages), you could use the Email AgileShape to send a single email, instead of associating your template with the Incoming Email property of a multi-participant manual activity.
Name
The Name field is used to display the name of an Email Template. The name specified should be meaningful to the process modeler.
From
The From field is used to specify what gets displayed in the From field of the Email Notification. This field supports the use of pre-defined process attributes. When a pre-defined process attribute is used, the “domain\username” will be converted automatically.
To
The To field is used to specify what gets displayed in the To field of the Email Notification. This field supports the use of pre-defined process attributes. When a pre-defined process attribute is used, the “domain\username” will be converted automatically. You can add multiple entries by separating them with a semicolon.
CC
The CC field is used to specify what gets displayed in the CC field of the Email Notification. This field supports the use of pre-defined process attributes. When a pre-defined process attribute is used, the “domain\username” will be converted automatically. You can add multiple entries by separating them with a semicolon.
Subject
The Subject field is used to specify what gets displayed in the Subject field of the Email Notification. This field supports the use of pre-defined process attributes.
Priority
The Priority field is used to specify the priority setting of the Email Notification. Valid values for this field include: Normal, High, and Low.
Format
The Format field is used to specify the format for which the content of the email will be displayed. Both HTML and plain text are supported formats for email. HTML is set as the default as part of the SMTP settings during the Server Configuration process. To send email in plain text format, select Text from the drop-down list.
NOTE: If you have chosen HTML as the format of the email, <br> tags are required for line breaks.
Left to Right/Right to Left
The Left to Right and Right to Left option buttons allow you to change the alignment for which text is inserted into the content section of the Email Template.
Content
The Content field is used to type the custom message to be displayed in the body of the Email Notification. This field supports the use of pre-defined process attributes.
NOTE: In order to show a URL link as a clickable HTML link in the email notification, the URL link must be entered into the email template with the HTML tags. The following is an example of how to include an URL link with HTML tags:
<a href="http://machinename:portnum/applicationname/ApproveRequest.aspx?${TaskID}">
Please click this link to invoke the Request Form.
</a> <br></br>
NOTE: If you have chosen HTML as the format of the email, <br> tags are required for line breaks when formatting the body of your email.
Attachments
The Attachments field is used to specify any files that you would like to include in the Email Notification. To attach a file to the notification, type in the full path of the file
e.g., C:\My Documents\sample.doc.
You can also use a custom attribute to attach a file to the notification
e.g., ${AttachDoc} or ${HomeDirectory}\...
NOTE: The file that you would like to attach must reside on the local machine.